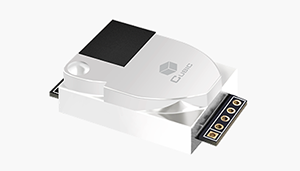
CUBIC CM1106 Single Beam NDIR CO2 Sensor Module
The cm1106 sensor platform allows you to use CM1106 CO2 sensors with ESPHome.
Communication with the CM1106 sensor is done via UART, so you need to define a
UART bus in your configuration. Connect the rx_pin to the TX pin of the CM1106
and the tx_pin to the RX pin of the CM1106 (note that the TX/RX labels are from the sensor’s
perspective). Additionally, set the baud rate to 9600 for proper communication.
# Example configuration entry
sensor:
  - platform: cm1106
    co2:
      name: CM1106 CO2 Value
Configuration variables:

co2 (Optional): The CO2 data from the sensor in parts per million (ppm). All options from Sensor.
update_interval (Optional, Time): The interval to check the sensor. Defaults to
60s.uart_id (Optional, ID): Manually specify the ID of the UART Component if you want to use multiple UART buses.
id (Optional, ID): Manually specify the ID used for actions.
cm1106.calibrate_zero Action
This action executes zero point calibration command on the sensor with the given ID.
To perform zero-point calibration, the CM1106 sensor must operate in a stable 400ppm CO₂ environment for at least 20 minutes before executing this function.
on_...:
  then:
    - cm1106.calibrate_zero: my_cm1106_id
You can provide an action to perform from Home Assistant
api:
  actions:
    - action: cm1106_calibrate_zero
      then:
        - cm1106.calibrate_zero: my_cm1106_id
Examples:
Button to start the calibration process:
button:
  - platform: template
    name: "CM1106 Calibration"
    entity_category: diagnostic
    on_press:
      then:
        - cm1106.calibrate_zero: my_cm1106_id
Pseudo-automatic calibration by CO2 value:
binary_sensor:
  - platform: template
    id: co2_calibration
    lambda: |-
      if (id(co2sensor).state < 400) {
        return true;
      } else {
        return false;
      }
    filters:
      - delayed_on: 15min
    on_press:
      then:
        - cm1106.calibrate_zero: my_cm1106_id
    internal: true